Archive | Cupcakes RSS feed for this section

Hostess Cupcake Birthday Cake & Other Birthday Stuff

16 Apr

Birthdays are the type of thing you look forward to and love so much when you’re young that you wish you could celebrate several times a year, but then start to avoid, ignore, and maybe even detest once you’re old enough to realize what getting older means. Maybe that’s just me?


You know, you figure out that birthdays are more than just cake, presents, slumber parties, and pink. Maybe you’re one of the lucky ones who birthdays still mean exactly that to, and growing up definitely has its perks, but often there are a lot of less desirable aspects of aging that accompany getting older that I won’t even start to get in to. I don’t think I have to!


Anyway, I think the key is really in that whole “young at heart” theory. Some people just seem to be able to remain “young” their whole lives, staying active, energetic, quick witted, and full of that zest for life that sometimes even the chronologically young lose sight of. Genetics surely plays a part, but it’s undeniable that it takes some effort, and a whole lot of motivation, passion, and interest in life and all it has to offer in order to really avoid aging.


So, to my older brother who just turned 30-something: don’t worry, I’ll keep you on your toes. Younger sisters keep older brothers young (I think it’s a scientific fact or something? Maybe younger sisters age older brothers? Nah…) You may get a few headaches over the years, that’s just a benign side effect of the process. You may get your heels run over by giant shopping carts full of cinder blocks, but that just makes you stronger. Let’s just say, you won’t ever be allowed to “phone it in” on my watch.


You may even get a cake. A cake that outwardly resembles a Hostess cupcake with some structural integrity issues…if you squint enough.  It may or may not be only several weeks late.  Just remember, it’s all in the name of keeping you young.


You’re welcome!

I had a perfect plan for this cake. A Hostess cupcake cake…accurate to size specifications, including everything from the cream filling (best scooped out with a finger and eaten slowly) to the frosting layer that was always so much fun to peel off and eat once the rest of the cupcake was gone. In theory, it seemed easy enough (not really).


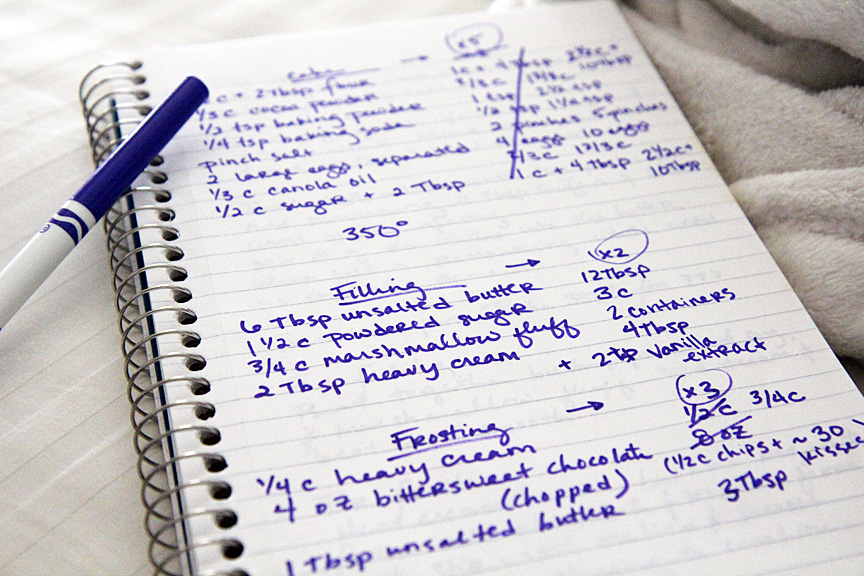
By the time I figured out I’d need to quintuple the recipe (within the first 5 minutes), rather than double it, as I’d originally (naively) anticipated, I knew it was a challenge I was unwilling to un-accept.


A few quick modifications to the original recipe as well as the diagram I’d elaborately constructed in my head, and everything seemed (key word: seemed) to be back on track.

Hostess Cupcake Birthday Cake

(Slightly adapted from the New York Times Faux Hostess Cupcakes Chocolate Cupcakes with Cream Filling Recipe)

I decided for the sake of simplicity to include the recipe for a single batch, which is intended to make 12 (one dozen) standard-sized cupcakes.  If you would like to make the birthday cake version, just go ahead and quintuple the recipe (x5), like I did.

Ingredients (For the Cake):

* 1/2 cup + 2 Tbsp all-purpose flour (they used cake flour, but I had none)
* 1/3 cup cocoa powder (I used Hershey’s cocoa powder)
* 1/2 tsp baking powder
* 1/4 tsp baking soda
* pinch salt
* 2 large eggs, separated (I used extra-large)
* 1/3 cup canola oil
* 1/2 cup + 2 Tbsp granulated sugar

Directions:

(*Remember the quantities given in the directions are for a single recipe, and that you will need to multiply everything by 5 if making the cake! )

Preheat oven to 350*F.  Grease a straight-edged bundt pan and a cake round.

Sift together the flour, cocoa powder, baking powder, baking soda, and salt.  Set aside.

Separate eggs into whites and yolks.  Add the whites to the bowl of a stand mixer and beat until soft peaks form.  Add 2 Tbsp of sugar and beat until stiff, glossy peaks.  Move whites to another bowl and set aside.

Add the yolks to the bowl of a stand mixer along with the oil, 1/2 cup of sugar, and 2 Tbsp water; beat together.  Turn mixer to low and gradually add the dry mixture to the wet mixture.  Mix until almost completely combined.  Mix 1/4 of the whites into the batter and then fold in the rest gently, until no white streaks remain.

Pour batter into prepared cake round until about 1/2 full.  Pour the remaining batter into the bundt pan.

Bake bundt pan for about 55 minutes, depending on your oven.  Check after about 45 minutes with a toothpick.  Cake is done when a toothpick inserted in the center comes out clean.  I made the mistake of NOT baking the bundt pan cake long enough and it ended up sinking.  DISASTER!

Bake the cake round for about 30 minutes, but again, check after about 20 minutes and take it out when a toothpick inserted comes out clean.  Allow both cakes to cool in their pans before removing and allowing to finish cooling on a cooling rack.

Once the cake round cake is fully cooled, using a cake knife, or a serrated bread knife, filet in half.

(while you’re waiting for both of the cakes to bake, whip together the filling!)


Ingredients (For the Cream Filling):

This is the single recipe for the cream filling if you want to make cupcakes. For the cake, I doubled (x2) the recipe.  I don’t know how it happened, but somehow I managed to NOT get a single photo of the cream filling process.  Ugh.  Well, it’s white and whippy.  Got that?  Ok, good.

* 6 Tbsp unsalted butter (I used salted butter)
* 1 1/2 cup powdered sugar
* 3/4 cup marshmallow fluff (use a full jar of marshmallow cream)
* 2 Tbsp heavy cream (I used 2 Tbsp vanilla extract instead)

Directions:

Cream the butter until soft and fluffy in the clean bowl of a stand mixer.  Add half of the powdered sugar and mix until smooth.  Add the marshmallow cream and the vanilla (or heavy cream, if you prefer) and mix until smooth.  Add the rest of the powdered sugar, and beat until creamy and fluffy.  Set aside.


Ingredients (For the Ganache):

This is the single recipe for the ganache if you’re just making cupcakes. I tripled (x3) the recipe for the cake.

* 1/4 cup heavy cream
* 4 oz bittersweet chocolate, chopped (I used a combination of Hershey’s semi-sweet chocolate chips and milk chocolate kisses)
* 1 Tbsp unsalted butter (Again, I used salted)

Directions:

(I suggest this not be made until the cake is fully assembled and ready to be frosted, since it will tend to set up when cooled)

Heat the heavy cream in a saucepan on medium-low heat.  Once the cream starts to boil gently, remove pan from heat and add in the chocolate.  Stir until melted and smooth, heating again on the stove if needed.  Don’t burn it, though!  Add in the butter and stir until melted and completely mixed.  To frost the cake, allow the ganache to cool slightly and then spoon on, smoothing over the top.  For best results, chill the whole cake for several hours before serving in order to allow the ganache to set.

To Assemble the Cake:

Place one of the cake round layers on a cake round, a cake stand, a plate (whatever you want your cake to be sitting on).  Place the bundt cake on top of the cake round (cone shape facing upward).  Since the cake round is slightly larger than the small end of the bundt sitting on it, slice around the cake round so it’s the same size.


Fill the center well of the bundt cake (you can hollow it out a little more if you want lots of cream filling, but don’t go overboard, that’s where I started having structural issues!) with cream filling.  Reserve about 1/2 cup of the cream filling frosting and put it in a plastic ziploc bag.  Throw it in the fridge.


Place the last cake round layer on the top of the bundt cake.  This is the fun part.  Use a serrated knife to round out the top of the cake (think top-of-the-cupcake kind of round).

Spoon ganache onto the top of the cake, starting in the center and working outward.  Take it slow, it will run off the edges and all over the plate you’re working on.  Not that I know.  Except that I totally know.  It will probably be a bit of a mess to clean up regardless, but there are worse things to have to do.  Refrigerate the cake for a couple hours to let the ganache set up.


Once everything is firm and in place, take your ziploc bag of cream filling frosting and let it soften a little.  Cut the corner off the bag and pipe on the swirly topping…little known fact (or maybe just little known fact I didn’t realize I didn’t know until now): there are 8 swirls on a hostess cupcake.  No more, no less.  Now you know.

As you can see, the center of the bundt cake managed to condense under its own weight, creating a center portion that’s more like a fudgey brownie than cake.  This part was everyone’s favorite, though, being the perfectionist that I am, it was the most annoying part to me, ha! =)


I made this on Saturday, and after a night in the fridge, I can tell you from experience: the ganache peeled off JUST like the real Hostess Cupcake frosting – WIN!

I’m not going to lie, this cake is A LOT of work.  Let’s just say a certain brother will NOT be getting the cake he requests next year.  I’m thinking maybe a Ding-Dong.


You know, a round sheet cake, a little filling, ganache coating, and be done with it?  To make it even cuter, I’d maybe even consider wrapping it in a giant piece of foil, but that’s only if I’m feeling any ounce of ambition left after this year’s Hostess Cupcake Cake fiasco!


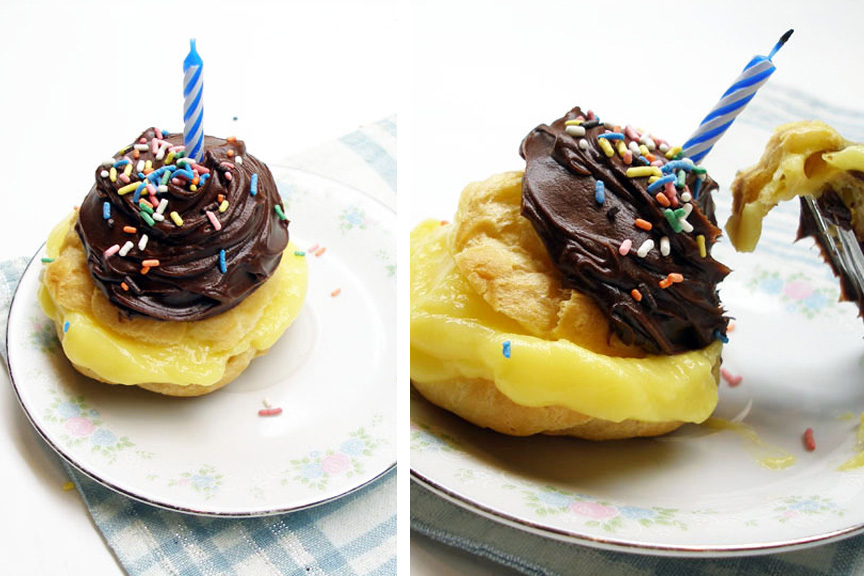
So, if you’re feeling a little more like going in a different direction, I would highly recommend Birthday Cream Puffs like I made for my brother’s birthday last March…

Or perhaps Birthday Cake batter Biscotti, like I made for my momma’s birthday last July…?!  Both Birthday Wins!

Happy {Belated} Birthday, Big Brother!

(When you end up feeling like, .2 years younger because of me and this cake, you owe me. BIG time)

Zucchini Cupcakes with Avocado Buttercream Frosting (Vegan)

11 Mar

First of all, happy Sunday!

I hope daylight savings isn’t kicking your butt as much as I know it’s going to kick mine once my better senses kick in and realize I’ve lost a sweet, sweet, precious hour of sleep! Hoping this gorgeous, sunny, blue sky weather we’ve been having lasts and helps me through this…with a teeny bit of help from the most giant mug of coffee of all time! =)

Anyway, if this post doesn’t do it, I’d like to make it clear that I’ve taken it upon myself to use March as an excuse for baking with more green foods!  It’s a Leprechaun’s world and I’m just living in it, St. Patty’s Day style.

When you hear “green foods,” there’s a good chance your mind immediately snaps to thoughts and images of leafy greens, herbs, green peppers, and zucchini – rarely ingredients that you’d see featured in dessert foods – but stay with me here.  My biggest concern here was keeping things yummy, somewhat healthy, green-colored, and yet FREE from ARTIFICIAL COLORING!  So the wheels started turning…

At the risk of blog readership plummeting big time, I ruled out spinach brownies (though I’ve heard those are good!), avoided celery ice cream, and didn’t even let my mind wander to a place where I’m 100% sure I’d be spending my entire post trying to convince you to try green onion pie.  You’re welcome.  Also, there’s no possible way I could even convince myself of that, so I’ve also spared myself the guilt of lying my way through an entire post.  I’m welcome?  Nevermind.

Anyway, I did, however, wrap my head around the prospects of zucchini and avocado, and found the idea to be promising!  Afterall, I’ve featured zucchini prominently in several recipe posts like this  and this, waxing rather poetic about the versatility and ease with which it blends into sweet treats.  Avocados hold a special place in my heart, too, and though featured here  as a savory Super Bowl snack, it’s still a fruit, dangit!

Zucchini bread and coffee cake inspired zucchini cupcakes seemed like the perfect choice!  Avocado could have been more challenging, but thankfully its creamy smooth texture practically begs to be made into frosting.  Ideal.  I wouldn’t recommend the frosting if you don’t like avocados, but then again if that’s the case I’d recommend you start liking avocados because they’re super delish and healthy!


And so, zucchini spice cupcakes with avocado buttercream frosting were born – TA DA!

Somewhat healthy?  Let’s be real, these are still cupcakes, but made with nutrient-packed plant-based ingredients.

Since we’re talking avocados, I think it’s important to note just a few of the awesome health benefits these powerful little green guys boast.  Not only are they high in vitamins and minerals such as folate (for heart health and prevention of birth defects), B-6, and potassium (helps to regulate blood pressure), they are also host to nutrients that combat oxidative damage, cholesterol levels, inflammation, and even cancer.

So again, healthy?  Ya, check!

Green color without any artificial coloring?  Yessir – Check.

Yummy?  Duh.  I mean, check.

I’ll be the first to admit these aren’t the sexiest little cupcakes – they’re sorta more like the homey looking little sweethearts that have a great personality, ha!  No, really.  Love them!

Zucchini Cupcakes with Avocado Buttercream (Vegan)

(Makes 6)

 Lightly spiced, zucchini-laced cupcakes with a super tender crumb – you’d never guess they were vegan if I didn’t blatantly tell you – really!  Perfectly accompanied by an unexpectedly smooth, delicious buttercream frosting packed with healthy omega-3’s and vitamins.  Double the recipe if you want to make a dozen.

 Cupcakes-

 Ingredients:

*7/8 cup all-purpose flour

*½ tsp baking powder

*½ tsp baking soda

*½ tsp ground cinnamon

*½ tsp ground nutmeg

*¼ tsp salt

*¼ cup granulated sugar

*¼ cup brown sugar

*½ cup non-dairy milk of your choice

*¼ cup canola oil

*1 Tbsp vanilla extract

*½ Tbsp white vinegar

*½ cup grated zucchini

Directions:

Preheat oven to 350*F.  Line a cupcake pan with 6 cupcake liners.

Sift together the flour, baking powder, baking soda, cinnamon, nutmeg and salt in a bowl.

In a separate bowl, stir together the granulated sugar, brown sugar, and canola oil.

In another bowl or cup, stir together the non-dairy milk, vinegar, and vanilla.

Pour the milk, vinegar, and vanilla mixture into the sugar and oil mixture.  Add grated zucchini and mix.  Gradually stir the dry ingredients into the wet ingredients, until just combined.  You don’t want to over mix.

Fill lined cupcake wells to just about full.  Bake for 15-18 minutes, rotating the pan half way through, until tops slightly spring back when pressed on.  Remove pan from oven and allow to cool about 10 minutes before removing cupcakes and placing on a wire cooling rack to finish cooling.  Allow to cool COMPLETELY before frosting.

Frosting-

This frosting is thinner than a typical buttercream frosting because of the softer texture of avocados compared to margarine or butter, but has just the lightest, yummiest hint of avocado vanilla flavor!

Ingredients:

*2 small avocados

*½ stick non-dairy margarine

*3-4 cups confectioner’s sugar

*1 tsp vanilla

*Dash of salt, to taste

Directions:

Peel avocados and remove pits.  Cream together the avocado and non-dairy margarine in the bowl of a stand mixer.  Add vanilla extract.  Slowly add confectioner’s sugar, ½ cup at a time until consistency is as desired.  Add salt to taste.   Frost your little heart out!  Go to it =)

Happy Spring!

Happy March!  Happy St. Patty’s month!


Martha Stewart’s Coconut Cupcakes and the Frosting that Changed my Life

4 Feb

Over the past few years especially, coconut, and namely the type of fat it contains, has become overwhelmingly controversial in terms of health and nutritional value.  There is no disputing the impressive vitamin (most notably folate), and even more so, mineral (very high in manganese, with a good amount of copper and selenium) and amino acid profile of these fruits, known as “drupes,” hailing from the palm family, but the fact that they are comprised of a generous ratio of saturated fat to carbohydrate and protein is what concerns some health conscious individuals and experts.

True, saturated fat has been touted as the “evil” fat said to raise levels of “bad” cholesterol in the body known as LDL cholesterol, and contribute to obesity, and for the most part, that is accurate.  However, what is rarely mentioned is the presence of different types of saturated fats, which vary greatly based upon their size.  Saturated fatty acids, or triglycerides, appear in foods as short chain, medium chain, or long chain fatty acid chains.  The problem with the typical American diet is that it contains way too many long chain saturated fatty acids, found in meats, dairy, and even some plant sources of fat, which are tough for the body to break down and convert to energy.  Coconut, on the other hand, as well as palm kernel oil, contains medium chain saturated fatty acids, which are thought to be used by the body much differently.  According to some research, medium chain fatty acids are more easily oxidized by the liver to produce energy, causing less of the fat to be stored long term in the body.

The bottom line here is not that the saturated fat in coconut would be recommended over unsaturated fatty acids like those found in foods like avocado, olive oil, fatty fish, and various seeds which raise levels of “good” HDL cholesterol in the body, but that it serves as a better replacement for other saturated fats that are already in the diet.  So, don’t feel like you have to steer clear of coconut because of the fat content in order to feel “healthy”!  Some fat in the diet is absolutely necessary for a healthfully functioning body, and the satiety factor we need to feel full and nourished.

Make some healthy substitutions every once in awhile, like for instance, drink coconut milk occasionally instead of your usual 2% dairy milk, or bake with coconut milk rather than butter, and you could be doing yourself a favor with a little health boost!  Go ahead and make a batch of these coconut cupcakes and enjoy (*cough* Super Bowl Party!! *cough*)…I’m not claiming these cupcakes are health food by any stretch, but let’s face it, coconut tastes awesome, too – just don’t go overboard!

Or, if you prefer freshy, citrusy lemon, you might enjoy Martha Stewart’s Lemon Cupcakes instead!

Martha Stewart’s Coconut Cupcakes with Coconut Buttercream Frosting

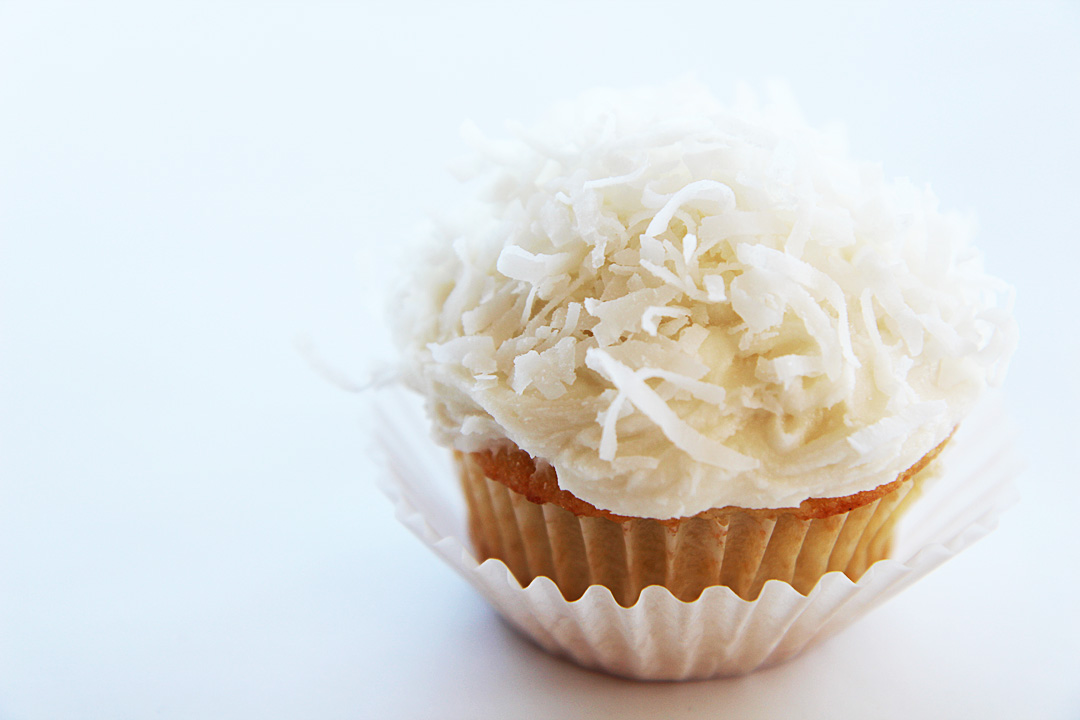
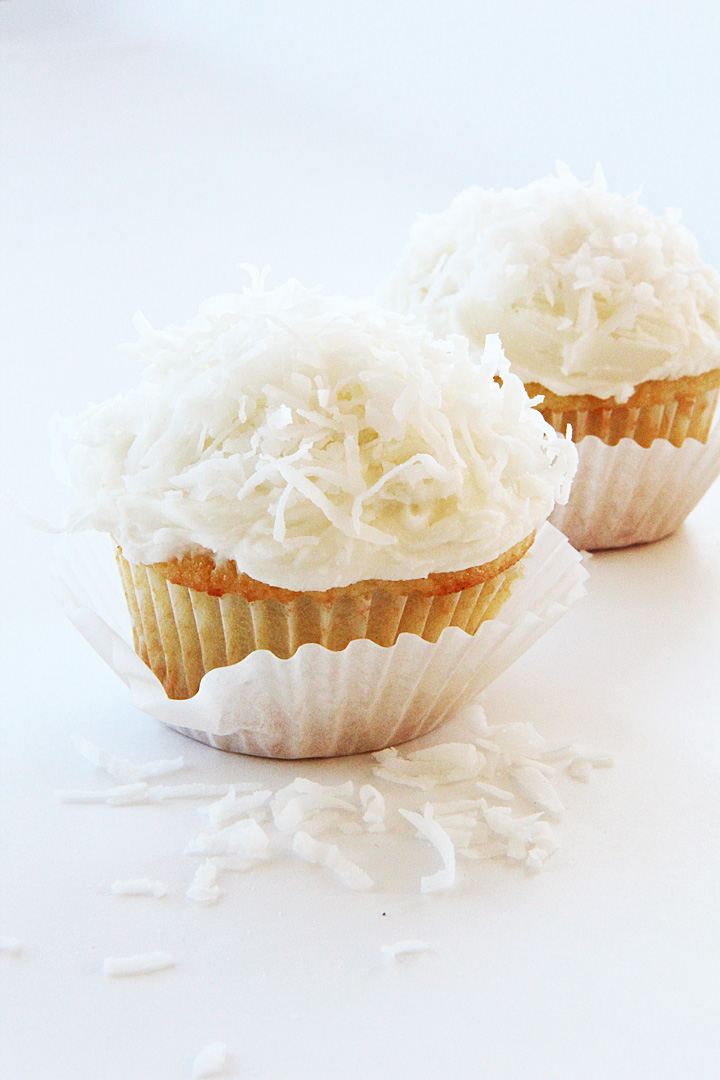
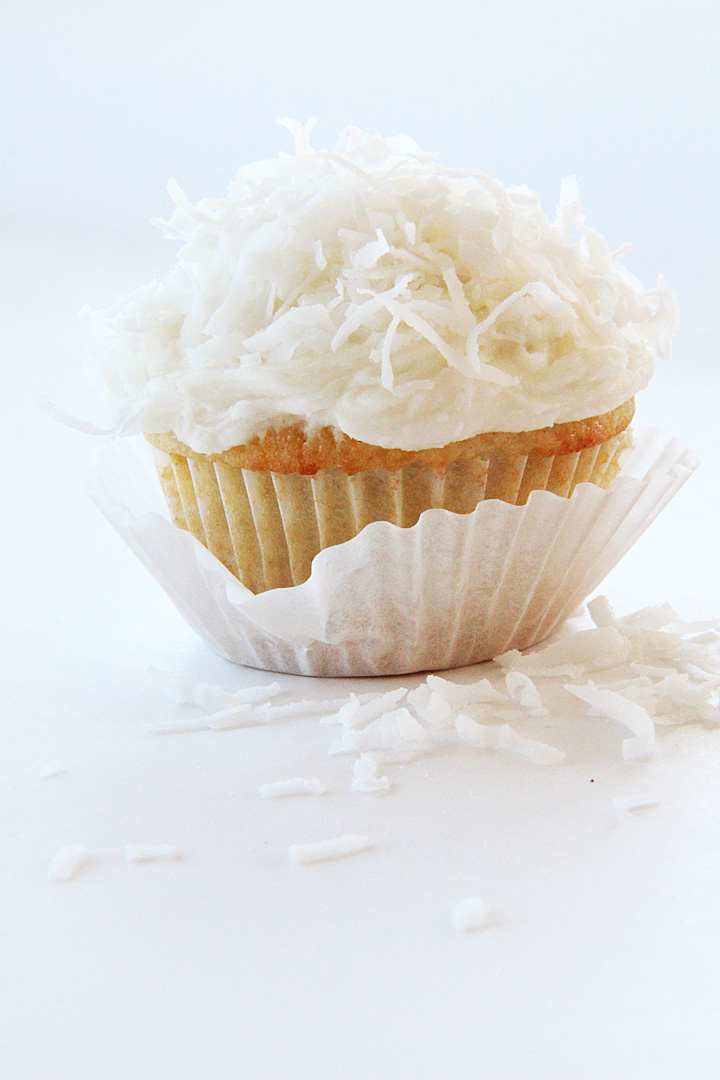
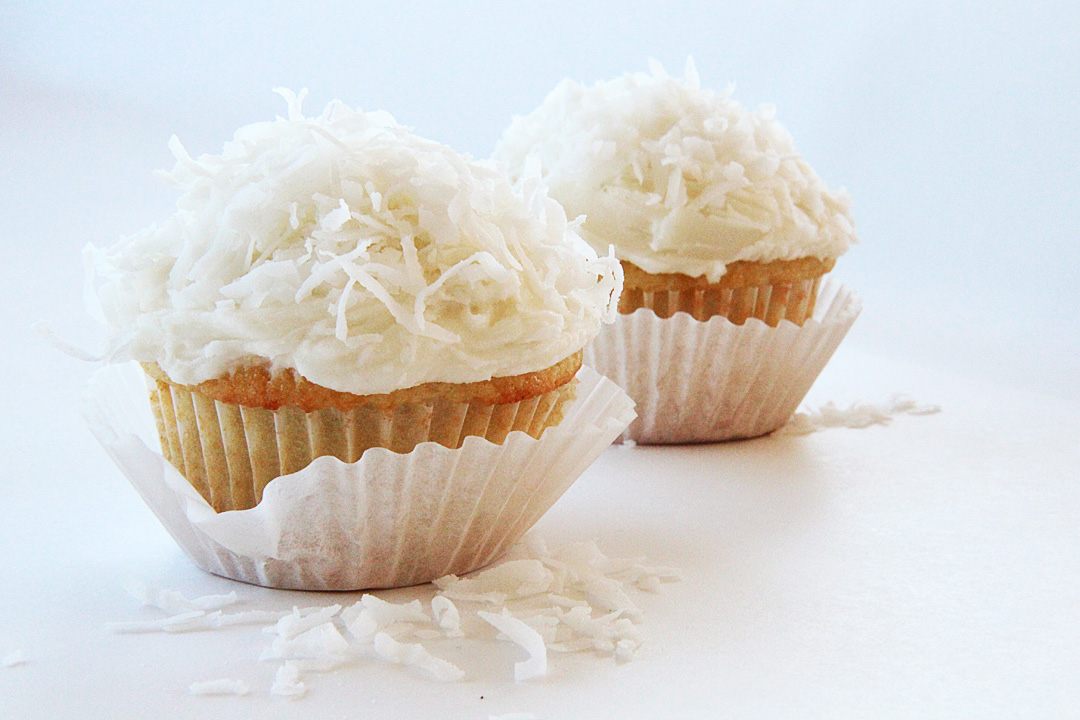
These are dense, hearty little cupcakes.  My favorite part of the recipe is that it includes ground coconut in the batter, and can easily be made dairy-free!  Ok, that’s one of my favorite parts, the other is the frosting.   The cupcake recipe is from Martha Stewart’s Cupcakes, but the frosting is all my own… it changed my life…it’s THAT good! :)  Sprinkle with sweetened shredded coconut, unsweetened shredded coconut, coconut flakes, or just leave them as is!  I used sweetened shredded coconut since that’s what I had on hand, but I gazed longingly at the photo of Martha’s version with its large, glorious, luxurious-looking flakes, and wished I could have used those instead!  I urge you to do so, if you get the chance…and then send me photos!

Ingredients:

Cupcakes:
* 1 3/4 cups all-purpose flour
* 2 tsp baking powder
* 1/2 cup packed sweetened shredded coconut
* 3/4 cup (1 1/2 sticks) unsalted butter, or dairy-free butter spread like Earth Balance
* 1 1/3 cups granulated sugar
* 2 large eggs + 2 egg whites
* 1 1/2 tsps vanilla extract
* 3/4 cup unsweetened coconut milk, from either a can or carton
* Coconut Buttercream Frosting (below)
* Sweetened or unsweetened shredded coconut or coconut flakes for topping

Frosting:
* 1/2 cup (1 stick) butter or dairy-free butter spread
* 1/4 cup Coconut butter (the thick portion at the top of the coconut milk can, or pre-made coconut butter in a jar)
* About 2-3 cups confectioner’s sugar
* Dash of salt
* 1 tsp vanilla extract
* 1/2 tsp coconut extract

Directions:

To make the cupcakes:
Preheat oven to 350*, and line standard muffin tins with paper liners.

Sift together the flour, baking powder and salt. Grind sweetened coconut shreds in a coffee grinder or food processor until finely ground, and stir into flour mixture.

In the bowl of a stand mixer, or by hand, cream butter or dairy-free butter spread and sugar until pale and fluffy. Gradually beat in the whole eggs, egg whites, and vanilla, scraping down the sides of the bowl with a spatula as needed. Reduce mixer speed to low and add flour mixture, alternating with additions of coconut milk until everything is combined. Don’t overmix!

Divide batter evenly among lined cups, filling each just about full. Bake for about 20 minutes, rotating the pan half-way through cooking time, until a toothpick inserted into the center of the cupcake comes out clean. Remove from oven and turn out onto a wire cooling rack to cool completely before frosting.

To make the frosting:
Cream together the butter or dairy-free butter spread and coconut butter in the bowl of a stand mixer. Slowly add in the dash of salt and confectioner’s sugar by the spoonful until course, crumbly mixture forms. Add in the vanilla extract and coconut extract. Beat frosting until smooth, adding more confectioner’s sugar if the frosting is too thin, and more vanilla extract, coconut extract, or splash of milk of choice if it’s too thick.

Slather with frosting, and top with coconut shreds or flakes at your own discretion….

…I’m still finding coconut shreds in places I didn’t know existed, so fair warning – Coconut bombs are a very real situation!

Disclaimer:

I am NOT a licensed or certified nutritionist or registered dietician.  I am NOT currently, but am on my way to becoming, a certified personal trainer.  I do, however, hold a bachelor’s degree in biological sciences with an emphasis in neurobiology, physiology, and behavior, as well as a strong interest in holistic and medical nutrition, especially as it applies to the prevention of disease, but PLEASE consult your doctor or a registered dietician for more comprehensive and tailored diet, fitness, and health information if you have health concerns or questions regarding any of the topics I discuss.  I am simply expressing my knowledge and opinions based upon my own research, reading, and education within the health, fitness, and science fields.

That being said, I hope you enjoy what I write and maybe learn something interesting along the way.  Thank you!

Martha Stewart’s Lemon Cupcakes with Lemon Buttercream Frosting

14 Jan

2012 is shaping up to be a busy year.  So far in January:

San Francisco.

Roadtrip – Sacramento –> LA.   LA –> Sacramento.

Engagement photoshoot for my brother & his fiancee in Santa Monica, CA.

Began a fitness certification course (more on that later!)

Was reunited with the most awesome lab group of all time.

Back on board the half-marathon training plan + gym routine.

Jumped on the winter citrus train & made these cupcakes!

Lemon cupcakes, to be exact!  They come from Martha Stewart’s Cupcakes, a book that was gifted to me by a friend who truly understands just how much I love little cakes with pretty frosting ( a lot!).  The photos in this book are incredible – bright, vibrant, beautiful – everything I aspire to achieve when embarking on my own food photo endeavors.  Love you, Martha!

I’ll be the first to admit my cupcakes don’t look a thing like hers…mostly because she has awesome pro photographers – I mean, check out that photo!! – while I’m a photo rookie, but also because I topped mine with lemon pudding and lemon buttercream frosting rather than the lemon curd and meringue frosting in the recipe.

I know, I know.  Lemon meringue cupcakes without the meringue are like…..lemon cupcakes.  Mmhmm.  Profound!

I went for a more simple approach, but don’t hold that against these lemony little gems!  Lemons, limes, grapefruit & oranges are definitely in full-swing right now.  I love how bright and sunny these little cakes are, perfect for those of you who are talking about snow & freezing temps where you’re at!

PS: I feel for you, because even though it’s been uncharacteristically warm & sunny for January here in Nor Cal, I still find myself piling on the blankets, guzzling hot coffee, and dreaming of summer weather!

Martha Stewart’s Lemon Cupcakes (with Lemon pudding & Buttercream)

Slightly adapted from Martha Stewart’s Cupcakes

Ingredients:

Cupcakes:

* 3 Cups All-purpose flour
* 1 Tbsp Baking powder
* 1/2 tsp Salt
* 1 Cup (2 Sticks) unsalted butter, room temperature
* 2 Cups Sugar
* 4 Large eggs, room temperature
* Finely grated zest of 3 lemons (3 Tbsp)
* 2 Tbsp Fresh lemon juice
* 1 tsp Pure vanilla extract
* 1 Cup Buttermilk (I didn’t have buttermilk, so I used plain milk)

Pudding:

* 1 Small Box Lemon flavored Jell-o Pudding
* 2 Cups Cold milk

Lemon Buttercream Frosting:

(I don’t have a set recipe for this, I adjust as I go – so here’s my best account of what I used!)
* 1 Stick Butter
* 3 Cups Confectioner’s sugar
* 1 Tbsp Vanilla extract
* Dash of Salt
* 1-2 Tbsp Fresh Lemon Juice
* 1-2 Tbsp Milk

Topping: 1 Tbsp lemon zest + clear sugar sprinkles

Directions:

For the cupcakes:

Preheat oven to 325*F. Line standard muffin tins with paper liners.
Sift together flour, baking powder and salt.
In the bowl of a stand mixer, cream together the butter and the sugar until fluffy. Add eggs one at a time, mixing to incorporate between each. Beat in zest and vanilla. Scrape down the bowl as needed.
Add the flour mixture in 3 batches, alternating with 2 additions of milk and lemon juice, beating until just combined after each addition.
Just about fill each lined cup with batter. Bake until slightly golden brown on top, about 25 minutes. I slightly overbaked mine (not on purpose!) So don’t do that.
As soon as possible, remove cupcakes from tin and allow to cool on a cooling rack completely before frosting.

Once cool, core the cupcakes and fill with pudding if you wish.  I simple piled it on top and piped on the frosting.  Top with fresh lemon zest & sparkly sugar sprinkles.

For the Pudding:

Follow the directions on the box, stir pudding mix into cold milk, continuing to stir for about 5 minutes until set up.

For the Frosting:

Beat room temperature butter in the bowl of a stand mixer until fluffy. Add confectioner’s sugar a few Tbsp at a time to allow everything to combine. Add the dash of salt and vanilla extract. Continue adding confectioner’s sugar, alternating with additions of the milk and lemon juice until frosting comes together. Add more milk if you like thinner frosting, and less if you like thicker frosting. Simple!

Currently reading: The February 2012 issue of InStyle Magazine

Currently listening to: The Pretty Reckless – “Just Tonight”  Obsessed!  Anyone else??

Currently snacking on: Hazelnuts!

Currently cuddling with:  This little guy!

Eventually: A sunny jog =)

Happy Saturday!