Tag Archives: Snack

Pumpkin Chocolate Chip Cookies

24 Oct

Despite the fact that it’s still hovering around the 80 degree mark during the day and staying fairly warm into the evening around these parts, I decided to open my first can of pumpkin of the year at the beginning of the month. I think I did a pretty good job of holding off until the season really hit, even while being tempted by food blog recipes featuring fall ingredients back in September and even August (!!!) I try not to burn myself out on seasonal foods toooooo early on (apples are a different story altogether – I’m looking at you, yet-to-be-posted apple galette!).

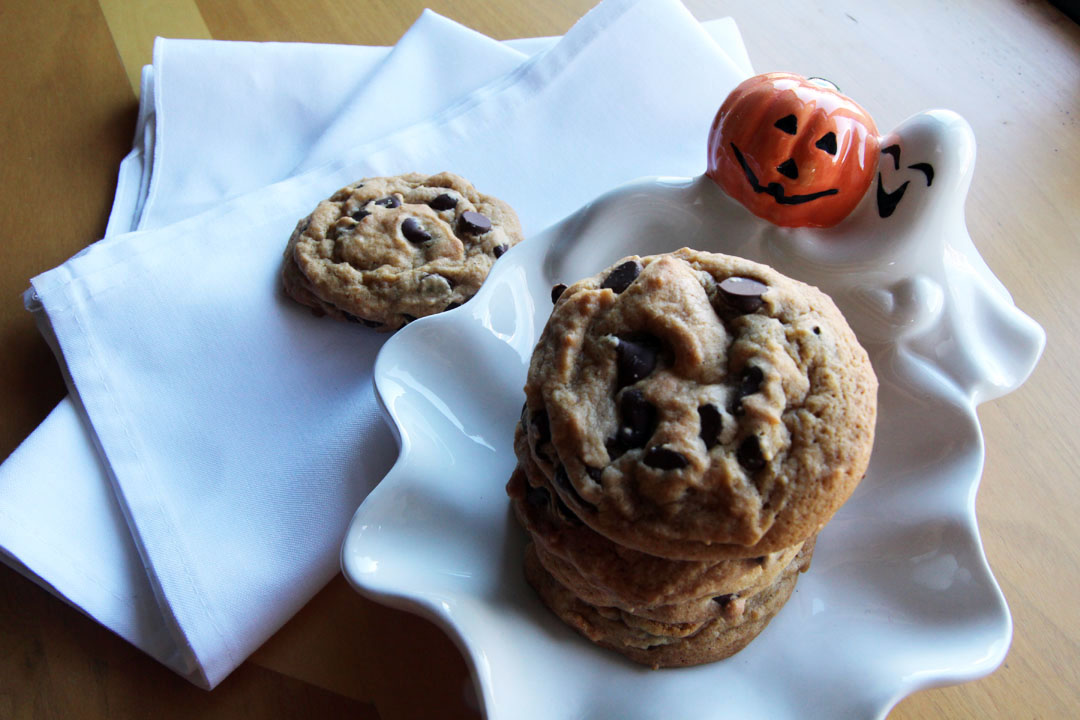
I did the usual pumpkin oats first and foremost, but really wanted to get myself knee-deep in pumpkin with these cookies! I couldn’t find a recipe online that I really liked the looks of, so obviously I improvised. These are my basic recipe with a few tweaks here and there, and for my first try, I think they came out pretty well. Not overpoweringly pumpkin-y…to be honest, I think they SMELL more pumpkin-spicey-fall-ish than anything! They’re a bit cakey, but I wouldn’t call them a cakey cookie; as far as I’m concerned, no one wants a cakey cookie. If I wanted a cakey cookie I’d probably just make cake. Or a cupcake. Or something else bready, duh.  It’s all about the chewy!

Pumpkin Chocolate Chip Cookies

Ingredients:

* 1 cup bread flour
* 1 1/2 cups all purpose flour
* 1/4 cup cornstarch
* 1 tsp baking soda
* 1 tsp salt
* 2 tsp pumpkin pie spice
* 3/4 cup margarine or butter flavored shortening
* 1 cup packed brown sugar
* 1/2 cup granulated white sugar
* 1/4 cup canned pumpkin (not the pie filling)
* 2 eggs
* 1 tsp vanilla extract
* 2 cups semi-sweet chocolate chips

Directions:

Preheat oven to 350* F. Line a cookie sheet with parchment paper or a Silpat.

Cream together the margarine or shortening and sugars in the bowl of a stand mixer. Add in eggs one at a time, mixing between. Add the vanilla extract and canned pumpkin, and mix well.

In a separate bowl, sift together the flour, cornstarch, baking soda, salt, and pumpkin pie spice.

Add the dry mixture to the wet mixture slowly, mixing between additions until well incorporated.

Stir in the chocolate chips by hand.

Drop golfball sized dough onto prepared cookie sheet. Bake about 11-12 minutes until just golden brown on top.

Still to do this month: World-record-holding corn maze! Maybe pumpkin carving.
Bring on the fall! =) What’s everyone doing for Halloween?

Half-Marathon Training Granola

21 Sep

I’m FINALLY back! All that moving took a lot out of me. Time to fall back in to all this madness…;)

***********

So, I’m going to level with you: I’m not a runner. I’ll never rarely lie and tell you that.

That’s all about to change. Ok, it’s not going to change at all, but I’m going to fake it. About a month ago, I decided on a whim that I’m going to run a half-marathon, and believe me, I’m as surprised as you are. I know what you’re thinking, but there’s probably no way you’re going to talk me out of it.

What’s that, you say, that’s a ridiculously long distance? Totally. It takes a ton of motivation, endurance, will power, and let’s face it, running? You’re absolutely right. My stubbornness might finally come in handy! You say jump, and I probably won’t ask “how high?”, but you say there’s no chance, and I’ll probably do my darndest to prove you wrong.

And so it begins! I don’t know which half I’d like to sign up for, nor have I chosen a training plan or decided how long it’s going to take me to feel ready to run 13+ miles yet (is forever too long?), so I’ve definitely still got some research to do- any suggestions or tips anyone is willing to offer would be much appreciated! In the mean time, I’m gearing up to include a bunch of half-marathon training-worthy recipes for meals and snacks as I go through the process! Trust me, I’m going to need all the help I can get!

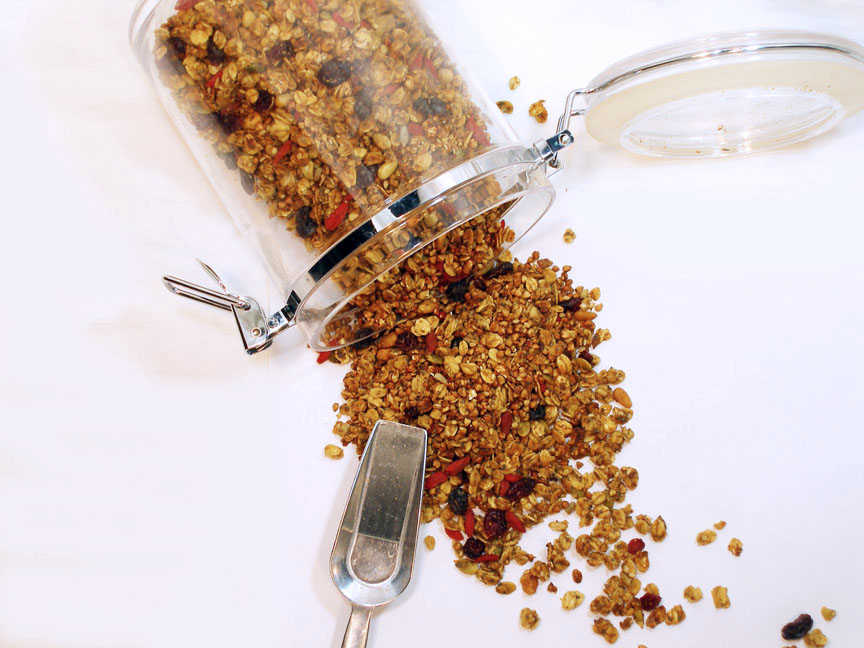
Half-Marathon Training Granola (AKA Berry & tropical preserves granola)

This granola is super yummy and versatile- add in whatever nuts and seeds you like or have on hand.  Also, I loved the snacky clumpy cluster factor I got with less stirring at baking intervals, but you can definitely crumble it down if you like to use it as a cereal or yogurt topping.  Also, this is a doubled recipe…so it makes a lot.

Ingredients:
Dry:
* 4 cups old fashioned rolled oats
* 1 cup puffed rice cereal
* 1 1/2 tsp salt
* 1/2 cup shredded coconut
* 1 cup roughly chopped pecans
* 1 cup raw peanuts
* 1/4 cup flax seeds
* 1/4 cup sesame seeds

Wet:
* 8 Tbsp (1/2 cup) berry preserves (I used marionberry jam)
* 6 Tbsp tropical flavored preserves (I used homemade pineapple orange which was thin)
* 8 Tbsp (1/2 cup) oil (any type of oil will work, I used canola since it was on hand)
* 2/3 cup brown sugar

Mix-ins:
* Cranberries, raisins, any kind of dried fruit you like, any amount you like- I left them out this time, but to be honest, it’s just because I forgot! Oops.

Directions:
Line a baking sheet with parchment paper or a silpat. Preheat oven to 325* F.

Stir all of the dry ingredients together in a big mixing bowl.

Mix all of the wet ingredients together in a separate, microwave safe bowl. Microwave for a couple minutes at a time, until boiling.

Pour the wet mixture over the dry and stir to combine well.

Dump the mixture onto the baking sheet and smooth into an even layer. It will be a fairly thick layer if you’re using a standard-sized baking sheet.

Bake 20 minutes, then stir lightly. Bake another 20 minutes, then gently move browner edge portions inward to keep them from burning. Bake an addition 10 minutes or so until golden brown. Don’t overdo it! I didn’t stir much at each interval and ended up with awesome granola clusters!

Let cool on the pan, then break into whatever size clusters you like. Store in an airtight container on the counter for as long as it actually lasts. You could also store it in the freezer if you don’t think you’ll eat it all within a few weeks.

Totally will run for granola 😉

Strawberry Nectarine Oat Squares

26 Aug

There are so manya fewone or two…ok, there’s one good thing about the quarter system, and that’s the fact that while all the other kiddies are wrapping up their endless days of summer and getting ready to ship off back to school, there’s still another month before our fall quarter starts.

HOWEVER,…and that’s a big-time HOWEVER, I love the “back to school” fever that seems to infect students and moms alike, spurring sales on school supplies & shelves stocked with fall clothes, and by the time I’m actually supposed to be doing my “back to schooling,” the hype is all hyped out, the sales are done salesing, and all the good fall clothes are all tapped out.

I think the fact that I haven’t actually had a summer break and have been attending classes basically non-stop since Christmas break of 2010 is completely irrelevant in this situation, too, so let’s not bring that up. Just because I haven’t gotten my fix of bright, summery fun, carefree, class free summer days filled with the beach, boys, and iced coffee doesn’t mean I can’t lament the fact that summer will soon be coming to an end, and then self medicate that loss with a hefty dose of hope that back to school is truly more about good times with friends at football games and frat parties rather than hours of mind-numbing, soul crushing classwork. That’s what all the magazines and ads say, anyway.

So anyway, the moral of this babbling is, I want the “back to school” time of year to last longer. Ya, maybe stretch those sales out til say, the end of September? I wanna get on that band wagon when that time actually comes for us quarter system kiddies (not to mention us Californians, who dread the thought of cool weather clothing well into October), and not a moment sooner…because obviously, I don’t want summer to end at all, EVER! But, if it has to, it should end in crisp, cool weather, new school supplies, fluffy sweaters, pumpkin spice lattes, tailgate parties, and all the hype that everyone else gets to embrace when the summer gravy train departs until next year.

The other moral of the story is, make these yummy strawberry nectarine oat-y bars for busy, get the kids or yourself out the door mornings! They’re like strawberry topped oatmeal on the go =)

Strawberry Nectarine Oat Squares
Adapted from Oh She Glows

Ingredients:

Base:
* 1 1/2 Cups Oats
* 1 Cup Whole Wheat Flour (I needed to add about 1/2 cup more to get a thick enough “dough”)
* 1/2 tsp Baking Soda
* 1/2 tsp Salt
* 1/2 Cup Brown Sugar
* 1 Egg
* 1/2 Cup + 2 Tbsp Margarine, melted
* 1/4 Cup Maple Syrup
* 2 Tbsp Almond Milk
* 1 Tbsp Sesame Seeds to sprinkle on top

Strawberry Nectarine Jam:
* 2 1/4 Cups Chopped Strawberry & Nectarine (Any ratio is fine- I used 1 nectarine and the rest strawberry)
* 3-4 Tbsp Sugar
* 1 Tbsp Cornstarch

Directions:
Preheat oven to 350*F. Grease or line an 8 x 8″ pan.

For the oat base, combine the oats, flour, baking soda, salt, and brown sugar in a mixing bowl.

Combine the melted margarine, maple syrup, almond milk, and egg in a separate bowl.

Add the wet mixture to the dry oat mixture, and stir to combine. You should get a pretty thick “dough”…if it seems too wet, add in a little extra flour, or more oats, or both until you get the right consistency.

Reserve 1/2 cup of the oat dough and set it aside. Press the dough evenly into the bottom of your pan.

Add your strawberry and nectarine mixture into a saucepan and heat on low for about 5 minutes. Add the sugar slowly, to taste. Heat for another 5 minutes until the mixture is juicy- use a spoon to pull out a few teaspoons of the juice in a mug or small bowl. Stir in the cornstarch. Add the juice and cornstarch mixture to the saucepan and simmer on low for about 10 more minutes, or until the jam thickens up. Take off heat and let cool for about 10 minutes.

Pour the jam on top of the oat base and spread evenly. Crumble the 1/2 cup of oat dough you reserved on top of the jam. Sprinkle with Sesame seeds.

Bake for 25-30 minutes, depending on how hot your oven gets. Allow to cool for 30 minutes before slicing.

For now, I think I’ll call these “back to summer school bars.” The calm before the fall!

Almond Butter Granola

11 Aug

I’m moving in a few weeks. Anyone who has ever moved before will probably agree that it’s one of the LEAST enjoyable tasks in life.

Actually, let me rephrase that. PACKING and then UNPACKING all of my crap precious stuff is the worst part, while actually being in a new place doesn’t bother me.

In fact, if you know me, you know I like to change things up pretty often if I get the chance…I love the new possibilities and the change of scenery.

What does any of this have to do with granola? Nothing, now that I think about it. Nothing what-so-ever. But, granola is super yum-town and I finally didn’t burn this batch.

At this point in my stressful life, I have to celebrate the little things that make me happy! =)

Almond Butter Granola

This is an awesome recipe because it’s so versatile and you can throw in practically anything you want, or have on hand. I used cranberries, raisins, goji berries, odds & ends of cashews, pecans, sunflower & pumpkin seeds, and it turned out crunchy and not overly sweet- perfect!

Ingredients:

Dry:
* 2 Cups Old-fashioned Oats
* 1/2 Cup Mixed Nuts, roughly chopped (I used cashews, pecans, sunflower seeds, and shelled pumpkin seeds)
* 1/2 Cup Uncooked Buckwheat
* 2 Tbsp Ground Flax
* 1 Tbsp Chia Seeds
* 2 Tbsp Sesame Seeds
* 1/2 tsp salt

Wet:
* 3 Tbsp Applesauce
* 3 Tbsp Almond Butter
* 1/4 Cup Brown Sugar
* 1/8 Cup Honey, 1/8 Cup Maple Syrup (or all honey, all maple syrup, or even agave would work)
* 1 tsp Vanilla Extract
* 1/2 tsp Almond Extract

Mix-Ins:
* 1/4 Cup Raisins
* 1/4 Cup Cranberries
* 1/8 Cup Goji Berries

Directions:
Preheat oven to 325* F.

Combine all of the dry ingredients together in a large mixing bowl.

Combine wet ingredients except for the extracts in a separate, microwave safe bowl. Microwave for 1-2 minutes, stirring halfway through.

Pour the wet mixture over the dry mixture and stir to coat. The mixture will seem a little dry at first, but it will all come together!

Spread the mixture out evenly on a lined baking sheet. Bake for 20-25 minutes until golden brown, stirring about every 5 minutes.

Let the mixture cool for 20 minutes, and then stir in your mix-ins.

Stored in an air-tight container, this should last for about a month, but it probably won’t…if you know what I’m saying! =)
(You can also make this gluten free by using gluten free oats)

I hope you’re all enjoying your week!

Excuse me while I go take a shot of granola (or three) and get back to packing.

Red Pepper Hummus

29 Jul

Don’t tell anyone, but I’m double-dipping (umm…pun intended?!) a little on my post today! Fresh red pepper hummus definitely falls more into the Sprouts side of my blog spectrum, but I wanted to feature it over here on Sprinkles as well! 🙂

If you missed it, my family hosted a Texas-Style Pit BBQ last weekend. In keeping with the spicy, bold flavored theme, I whipped up this red pepper hummus as an appetizer. Pepper Predominant as it may be, I have to admit the peppers didn’t come from our garden…Shh!

Green peppers just wouldn’t have had the same effect in the recipe, I don’t think, though maybe eventually I’ll give them a try.

Red Pepper Hummus

Ingredients:

* 1 15 oz. Can Garbanzo Beans
* 2 Tbsp Tahini
* 2 Tbsp Lemon Juice
* 1 Medium Sized Red Pepper, chopped
* 3 Chipotle Peppers in Adobo Sauce, sliced
* 2 Tbsp Chopped Garlic
* 1 tsp Paprika
* 1/8 tsp salt
* Pepper to taste

Directions:

Rinse and drain canned garbanzo beans, and add to the bowl of a food processor. Process until smooth. Add in tahini, lemon juice, chopped garlic, and process again until smooth.

Add the chopped red pepper, processing in between additions. Add in the chipotle peppers and process.

Finally, add the paprika, and salt and pepper to taste. Adjust seasonings as needed.


From the looks of it, you’d think I could eat hummus on just about anything and everything…You might be right!