Tag Archives: Dessert

Martha Stewart’s Spice Cupcakes with Molasses Buttercream

24 Dec

Spice-Cupcakes5

 Merry Christmas Eve!

Can you believe it’s already here, because I’m having a tough time wrapping my brain around 2012 coming to an end.  You know what they say, time flies when you’re having fun…so I must have been having A LOT of fun this year!

Christmas Eve is the anniversary of my parents’ engagement.  My dad proposed at a Mexican restaurant long ago, and as far back as I can remember, they have either gone out for Mexican food or we have made lots of yummy Mexican food at home to share every year.  Without fail, everyone is scurrying to finish shopping and wrapping last minute gifts, and then things wind down around midnight when we all gather to hear ‘Twas the Night Before Christmas, followed by the Grinch who Stole Christmas – the original, cartoon version of course!  I love these little things that are all our own.  I can count on so much every year with my family it makes the holidays feel extra special.

Spice-Cupcakes1

Mrs. Kostyra’s Spice Cupcakes (From Martha Stewart’s Cupcakes)

These spice cupcakes are not traditional for me, nor are they something I had attempted to bake before this first time, but I’m working my way through Martha’s book and these seemed festive enough for this time of year.  The original frosting suggested for this recipe is an orange glaze, but I had high hopes for a molasses frosting I had floating around in my head.  Seems like everything worked out, and these little guys baked up perfectly sky high due to all the leavening!  Try them out. 🙂

Ingredients:

* 1/2 cup (1 stick) unsalted butter, room temperature

* 1 1/2 cups dark brown sugar

* 4 large eggs

* 1 1/2 cups milk, room temperature

* 4 cups cake flour, sifted (I used regular, all purpose flour)

* 1 Tbsp + 1 tsp baking powder

* 1/2 tsp salt

* 2 tsps ground cinnamon

* 1 tsp ground allspice

* 1/2 tsp ground nutmeg

* 1/2 tsp ground mace (I used plain old ground black pepper)

* Pinch of ground cloves

* 18-24 pecan halves, depending on how many cupcakes you end up with, for topping (optional)

Directions:

Preheat oven to 350*F.  Grease and flour or line a standard muffin tin with cupcake papers.

In the bowl of a stand mixer, cream the butter,  and brown sugar until pale and fluffy.  Add eggs one at a time, mixing between additions until well combined, scraping down the sides of the bowl as necessary.

In a separate bowl, sift together the flour, baking powder, salt, and spices. (Martha’s recipe says to do this 3 times, but I just sifted everything once!)  Reduce mixer speed to low and alternate additions of the flour mixture and the milk until batter comes together.

Divide batter evenly amongst cupcake wells, filling 3/4 full, or slightly more.  (The recipe states that it makes 24 cupcakes, but I fill my tins pretty full and only got about 18).  Bake 15-20 minutes, depending on your oven, just until a toothpick inserted into the center of a cupcake comes out clean.  Allow cupcakes to cool about 10 minutes in the pan before removing and allowing to finish cooling on a wire rack.

Allow to cool completely before frosting.

Molasses Buttercream Frosting

Ingredients:

* 1/2 cup (1 stick) salted butter

* 3 cups powdered sugar

* 1-2 Tbsps molasses

* 1-2 Tbsps milk

Directions:

In the bowl of a stand mixer, cream the butter.  Add a cup of powdered sugar and mix until crumbly.  Add 1 Tbsp molasses, and mix again until combined.  Add in remaining 2 cups powdered sugar.  Add in the additional Tbsp molasses to taste, or if you like a lighter flavor, add 1 Tbsp milk instead.  Whip until smooth.  If too thick, add in the other Tbsp milk.  If too thin, add in a bit more powdered sugar.  Refrigerate until ready to use.

Spice-Cupcakes3


Spice-Cupcakes4


Spice-Cupcakes6I’m always curious as to what everyone else’s Christmas and holiday traditions are…whatever you have planned, I hope you’re surrounded by family & friends, love, lots of smiles, and lots of sweet treats!

…And don’t forget to leave some out for good ol’ St. Nick & the reindeer! 🙂

Eggnog Cupcakes with Eggnog Buttercream

4 Dec

Happy Holidays!

Right now I’m looking forward to nothing more than tuning in to watch the Victoria’s Secret Fashion Show!  I am not ashamed to admit I look forward to it every single year.  You also better believe I’m the girl who dreams about walking down that runway.  With those gorgeous angel wings.  And of course abs of steel!  One day, one day ;)  Expect a full recap from me after the show!

Ok, ok, off the fantasy for now, and on to my day.  It was a busy one, and I’m glad to be home.  I work as an NMD Assistant at a small clinic for the two most amazing Doctors anyone could ever hope to meet.  They just got back from a vacation/honeymoon in Hawaii after tying the knot there over Thanksgiving.  Congrats to them both!  I have no idea how that transitions in to talking about cupcakes, but I feel like cupcakes really need no segue anyway…they pretty much fit in with anything and everything.

These eggnog cupcakes with eggnog buttercream were a HUGE hit around here, and by that I mean, comments like “Those are my favorite so far.  Of anything you’ve made… recently” were made. (He knows who he is, so I don’t feel the need to name names!)  Nevermind the fact that I have no idea what the timescale was on “recently,” and how it could just as easily have meant within the last 2 days as within the last 2 years.  Details.    What I’m trying to say is this:  Either I haven’t made anything good lately, or these really are awesome.  At the risk of opening myself up to comments from certain people, I think I can honestly say it’s the latter.  Or at least hope.  Actually, you should make them and then let me know, just to be sure!

Eggnog Cupcakes

Ingredients:

1 1/3 cups flour

1/4 tsp baking soda

1/2 tsp baking powder

1/2 tsp salt

1/4 tsp nutmeg

1 egg

1 1/8 cups eggnog

1/4 cup canola oil

1 Tbsp apple cider vinegar

1 tsp vanilla

1 cup sugar

Directions:

Preheat your oven to 350*F and line a 12 well cupcake pan with paper liners.

Add canola oil, and sugar to the bowl of a stand mixer and mix until combined.  Add in the eggnog, egg, vanilla extract, and apple cider vinegar, and mix again until well combined.

In a separate bowl, sift together the flour, baking soda, baking powder, nutmeg and salt.

Add dry flour mixture to the wet mixture, turning mixer on low between additions.  Mix until batter forms.

Add 1/4 cup-fulls of batter to each well of the pan.  Bake about 20 minutes, rotating the pan in the oven half-way through.  Allow to cool in the pan for about 15 minutes before removing cupcakes and setting on a cooling rack.  Do not frost until completely cool!

Eggnog Buttercream Frosting

Ingredients:

3 1/2 cups powdered sugar

1 stick margarine

3 Tbsp eggnog

1 tsp vanilla extract

1/4 tsp nutmeg

Pinch of salt

Directions:

Cream the margarine in the bowl of a stand mixer.  Add in 2 cups of powdered sugar and mix until crumbles form.  Add in salt and eggnog, and mix again.  Add in remaining 1 1/2 cups of powdered sugar, and then the vanilla extract.  Whip on high until smooth.  If buttercream seems too thin, add a bit more powdered sugar – if the opposite is true, add a little more eggnog.  Add in the nutmeg and whip again.  Store in refrigerator until ready to use!

A Heart-Felt Heart-to-Heart about LA & Gluten Free Vegan Carrot Cake

21 Aug

As my time spent in Los Angles this summer is coming to an end, I can’t help but get a little teary-eyed, thinking about all of the amazing things I’ve done and seen, and the unforgettable people in my life I’ve had the privilege of reconnecting with and spending time with.  Time has literally flown by, and it feels like just yesterday I over-packed my AC-deprived car and headed southbound in 110 degree heat to the town I left my heart in many years ago.  I remember the promise of freedom, relief, excitement, and a summer to be remembered filling the air, and my wide, happy eyes.  It’s not often I get to up and take off, though my spirit often wants to – I call it wanderlust, and the yearning for a new beginning, new experiences, sights, sounds, etc. rather than being restless and discontent.  Restless, I can be, but I’m often content, so that’s not what I would call it.  And now, here I am wrapping things up, both physically and emotionally; now experiencing that discontent thing a little as I wish for a few more weeks, at the very least.  Instead, I have just a few more days.

Going through my last two months here, I’ve been filtering, revisiting, and questioning, but am happy to have come out realizing I wouldn’t have done anything differently, nor would I trade my time here for anything in the world!  I’m so pleased to say I can go back home with no regrets, knowing that I’ve had the best of intentions and kept my heart big and open,  I’ve learned a lot about myself, and certainly re-confirmed what I already knew about the beach before in that somehow it heals me, soothes me, and always keeps me coming back! The other night, I planned to make a trip to the gym, and instead drove right on by, heading for the ocean instead.  I spent a blissful evening walking in the sand, breathing in the sea breeze, and meandering around the pier in Santa Monica, which is basically a carnival on the water that is brilliantly lit up at dusk.  It’s not the first time I’ve found myself at the beach instead of somewhere else while I’ve been here, that’s for sure, be it Santa Monica, Venice, Laguna, Newport, San Diego….the ocean just does that to me 🙂

No matter where I’ve been, or what I’ve been doing, the common thread in my lovely time here, as I mentioned before, has been the people.  I have some amazing friends that I don’t get to see anywhere near as often as I’d like, and though with some of them it had been months or years, I know they are true friends because everything seems to come right back.  I’ve spent time with friends from high school ( Hi, AP and Brett!), from my days at UC Davis (Love you, Steph!), from years and years back in my Newport Beach days (ahem, TK), and so many more I hope to see and keep in touch with much more often.  I even decided since I’ve been here that I’d love to start writing  hand-written notes or postcards to the people more special in my life so that we can check in with each other and say hi in a much cooler way than with email and Facebook!  The internet is an amazing thing (obviously! haha), but sometimes the most precious and thoughtful means of showing you’re thinking of someone are often lost to quick text messages.  I’ll be getting in touch for your addresses – you know who you are! 😉

I’ve had the summer of my life, in the most cheese-ball sounding, but completely serious way possible!  So many thanks, I love you guys!

I’m positive I’ll be writing more about my time and experiences in LA some more soon, but for now, let’s get into a recipe I tried for the first time while here: gluten free vegan carrot cake…and of course, vegan cream cheese frosting!  It was super awesome, if I do say so myself 🙂

Gluten Free Vegan Carrot Cake Recipe

It’s not often I really really enjoy a gluten free AND vegan cake or bread recipe, since I have yet to fully perfect that art form, but this cake was really delicious.  The flavor was spot-on, from what I remember a good carrot cake to be – a yummy spice-cake with lots of carrot, and the pineapple was a new addition to me, but I think it worked in the crushed form.  It’s pretty dense, and much like a quick bread.  Loved it

Ingredients:

* 1 cup gluten free flour mix (I used Bob’s Redmill)

* 1/2 coconut flour
(more…)

Summery Lemon Zest Sugar Cookies {Dairy Free}

6 Aug

Just because it’s August doesn’t mean I’m willing to allow the summering to wind down.  Quite the opposite, in fact!  I’m diving in even further the next couple of weeks, because let’s face it – I have too many more things left on my Los Angeles summer bucket to throw in the (beach) towel now!


Summer dresses are more in full swing than ever before.  Car windows are indefinitely rolled down.  Pedicures are sandy beach scuffed.  Hair & cheeks are perpetually breeze-blown and sun-kissed.  Chilly smoothies are a daily affair, and Cafe Gratitude shakes a way too expensive, forbidden love affair.

 Lemon Zest Sugar Cookies

(Adapted from my lime zest sugar cookies)

Tangy but sweet summer twist on the classic drop sugar cookie.  Citrusy, refreshing, and perfect for the hot weather months.  If you wanted to make a grapefruit version, we’d probably be best friends! 🙂

Ingredients

2  3/4 cups all purpose flour

1 tsp baking soda

1/2 tsp baking powder

1/2 tsp salt

1 cup non-dairy margarine (ex: Earth Balance)

1  1/2 cups granulated sugar

1 Tbsp ground flax seed mixed with 3 Tbsp water

1 egg

1 tsp vanilla extract

1 Tbsp non-dairy milk (ex: soymilk)

juice of 1 lemon

zest of 1 lemon

1/4 cup granulated sugar + zest of 1 lemon mixed, for rolling

Directions

Line a cookie sheet with parchment paper or a Silpat.  Mix together the ground flax and water, set aside.

Cream together the margarine and sugar in the bowl of a stand mixer.  Add the egg, flax and water mixture, and vanilla extract, lemon juice, and zest, and beat until fluffy.

In a separate bowl, sift together the flour, baking soda, baking powder, and salt.  Slowly add dry mixture into wet, mixing between additions.  Scrape down the sides of the bowl as necessary.  If the dough is a little too dry, add in the non-dairy milk; if the dough looks ok at that point, feel free to omit.

Scoop dough out onto a piece of plastic wrap, wrap tightly, and put in freezer for about an hour or so.  When ready to bake, preheat over to 350* F, and scoop dough into 2 Tbsp size chunks.  Roll each into a ball with your hands, and roll in the sugar and zest mixture before placing on cookie sheet.

Back 8-10 minutes until edges are golden brown.  Allow to rest on the pan a few minutes before using a spatula to transfer baked cookies to a cooling rack.


Everything is warmer.  Everything is brighter.  Love is lovier.  Ice cream just tastes better dripping down your arm on the Santa Monica Boardwalk.  Twinkling white lights are more charming strewn across a summertime porch.  Laughter with friends is more therapeutic.


I wish I could press pause on life so that summer could live on well beyond September and into October…but I’ll settle for bike rides in Venice, and more sweet times to come as August lives on <3

My heart is happy when pretty things fill my weekends and I get to put pencil to paper to create.  The more I do, the more I inspire myself to want to create, which I love!

 Skies are blue, and dreams really do come true…even on a Monday morning! 🙂

XOXO


Hostess Cupcake Birthday Cake & Other Birthday Stuff

16 Apr

Birthdays are the type of thing you look forward to and love so much when you’re young that you wish you could celebrate several times a year, but then start to avoid, ignore, and maybe even detest once you’re old enough to realize what getting older means. Maybe that’s just me?


You know, you figure out that birthdays are more than just cake, presents, slumber parties, and pink. Maybe you’re one of the lucky ones who birthdays still mean exactly that to, and growing up definitely has its perks, but often there are a lot of less desirable aspects of aging that accompany getting older that I won’t even start to get in to. I don’t think I have to!


Anyway, I think the key is really in that whole “young at heart” theory. Some people just seem to be able to remain “young” their whole lives, staying active, energetic, quick witted, and full of that zest for life that sometimes even the chronologically young lose sight of. Genetics surely plays a part, but it’s undeniable that it takes some effort, and a whole lot of motivation, passion, and interest in life and all it has to offer in order to really avoid aging.


So, to my older brother who just turned 30-something: don’t worry, I’ll keep you on your toes. Younger sisters keep older brothers young (I think it’s a scientific fact or something? Maybe younger sisters age older brothers? Nah…) You may get a few headaches over the years, that’s just a benign side effect of the process. You may get your heels run over by giant shopping carts full of cinder blocks, but that just makes you stronger. Let’s just say, you won’t ever be allowed to “phone it in” on my watch.


You may even get a cake. A cake that outwardly resembles a Hostess cupcake with some structural integrity issues…if you squint enough.  It may or may not be only several weeks late.  Just remember, it’s all in the name of keeping you young.


You’re welcome!

I had a perfect plan for this cake. A Hostess cupcake cake…accurate to size specifications, including everything from the cream filling (best scooped out with a finger and eaten slowly) to the frosting layer that was always so much fun to peel off and eat once the rest of the cupcake was gone. In theory, it seemed easy enough (not really).


By the time I figured out I’d need to quintuple the recipe (within the first 5 minutes), rather than double it, as I’d originally (naively) anticipated, I knew it was a challenge I was unwilling to un-accept.


A few quick modifications to the original recipe as well as the diagram I’d elaborately constructed in my head, and everything seemed (key word: seemed) to be back on track.

Hostess Cupcake Birthday Cake

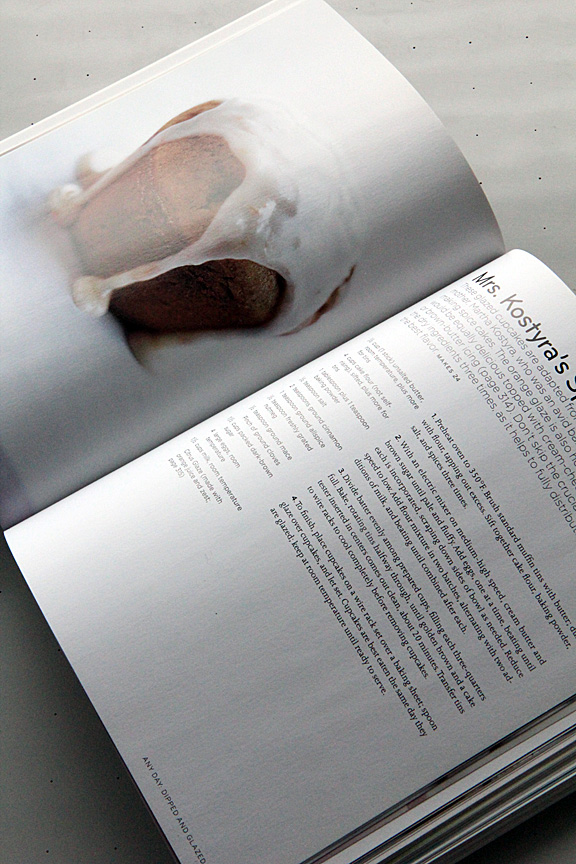
(Slightly adapted from the New York Times Faux Hostess Cupcakes Chocolate Cupcakes with Cream Filling Recipe)

I decided for the sake of simplicity to include the recipe for a single batch, which is intended to make 12 (one dozen) standard-sized cupcakes.  If you would like to make the birthday cake version, just go ahead and quintuple the recipe (x5), like I did.

Ingredients (For the Cake):

* 1/2 cup + 2 Tbsp all-purpose flour (they used cake flour, but I had none)
* 1/3 cup cocoa powder (I used Hershey’s cocoa powder)
* 1/2 tsp baking powder
* 1/4 tsp baking soda
* pinch salt
* 2 large eggs, separated (I used extra-large)
* 1/3 cup canola oil
* 1/2 cup + 2 Tbsp granulated sugar

Directions:

(*Remember the quantities given in the directions are for a single recipe, and that you will need to multiply everything by 5 if making the cake! )

Preheat oven to 350*F.  Grease a straight-edged bundt pan and a cake round.

Sift together the flour, cocoa powder, baking powder, baking soda, and salt.  Set aside.

Separate eggs into whites and yolks.  Add the whites to the bowl of a stand mixer and beat until soft peaks form.  Add 2 Tbsp of sugar and beat until stiff, glossy peaks.  Move whites to another bowl and set aside.

Add the yolks to the bowl of a stand mixer along with the oil, 1/2 cup of sugar, and 2 Tbsp water; beat together.  Turn mixer to low and gradually add the dry mixture to the wet mixture.  Mix until almost completely combined.  Mix 1/4 of the whites into the batter and then fold in the rest gently, until no white streaks remain.

Pour batter into prepared cake round until about 1/2 full.  Pour the remaining batter into the bundt pan.

Bake bundt pan for about 55 minutes, depending on your oven.  Check after about 45 minutes with a toothpick.  Cake is done when a toothpick inserted in the center comes out clean.  I made the mistake of NOT baking the bundt pan cake long enough and it ended up sinking.  DISASTER!

Bake the cake round for about 30 minutes, but again, check after about 20 minutes and take it out when a toothpick inserted comes out clean.  Allow both cakes to cool in their pans before removing and allowing to finish cooling on a cooling rack.

Once the cake round cake is fully cooled, using a cake knife, or a serrated bread knife, filet in half.

(while you’re waiting for both of the cakes to bake, whip together the filling!)


Ingredients (For the Cream Filling):

This is the single recipe for the cream filling if you want to make cupcakes. For the cake, I doubled (x2) the recipe.  I don’t know how it happened, but somehow I managed to NOT get a single photo of the cream filling process.  Ugh.  Well, it’s white and whippy.  Got that?  Ok, good.

* 6 Tbsp unsalted butter (I used salted butter)
* 1 1/2 cup powdered sugar
* 3/4 cup marshmallow fluff (use a full jar of marshmallow cream)
* 2 Tbsp heavy cream (I used 2 Tbsp vanilla extract instead)

Directions:

Cream the butter until soft and fluffy in the clean bowl of a stand mixer.  Add half of the powdered sugar and mix until smooth.  Add the marshmallow cream and the vanilla (or heavy cream, if you prefer) and mix until smooth.  Add the rest of the powdered sugar, and beat until creamy and fluffy.  Set aside.


Ingredients (For the Ganache):

This is the single recipe for the ganache if you’re just making cupcakes. I tripled (x3) the recipe for the cake.

* 1/4 cup heavy cream
* 4 oz bittersweet chocolate, chopped (I used a combination of Hershey’s semi-sweet chocolate chips and milk chocolate kisses)
* 1 Tbsp unsalted butter (Again, I used salted)

Directions:

(I suggest this not be made until the cake is fully assembled and ready to be frosted, since it will tend to set up when cooled)

Heat the heavy cream in a saucepan on medium-low heat.  Once the cream starts to boil gently, remove pan from heat and add in the chocolate.  Stir until melted and smooth, heating again on the stove if needed.  Don’t burn it, though!  Add in the butter and stir until melted and completely mixed.  To frost the cake, allow the ganache to cool slightly and then spoon on, smoothing over the top.  For best results, chill the whole cake for several hours before serving in order to allow the ganache to set.

To Assemble the Cake:

Place one of the cake round layers on a cake round, a cake stand, a plate (whatever you want your cake to be sitting on).  Place the bundt cake on top of the cake round (cone shape facing upward).  Since the cake round is slightly larger than the small end of the bundt sitting on it, slice around the cake round so it’s the same size.


Fill the center well of the bundt cake (you can hollow it out a little more if you want lots of cream filling, but don’t go overboard, that’s where I started having structural issues!) with cream filling.  Reserve about 1/2 cup of the cream filling frosting and put it in a plastic ziploc bag.  Throw it in the fridge.


Place the last cake round layer on the top of the bundt cake.  This is the fun part.  Use a serrated knife to round out the top of the cake (think top-of-the-cupcake kind of round).

Spoon ganache onto the top of the cake, starting in the center and working outward.  Take it slow, it will run off the edges and all over the plate you’re working on.  Not that I know.  Except that I totally know.  It will probably be a bit of a mess to clean up regardless, but there are worse things to have to do.  Refrigerate the cake for a couple hours to let the ganache set up.


Once everything is firm and in place, take your ziploc bag of cream filling frosting and let it soften a little.  Cut the corner off the bag and pipe on the swirly topping…little known fact (or maybe just little known fact I didn’t realize I didn’t know until now): there are 8 swirls on a hostess cupcake.  No more, no less.  Now you know.

As you can see, the center of the bundt cake managed to condense under its own weight, creating a center portion that’s more like a fudgey brownie than cake.  This part was everyone’s favorite, though, being the perfectionist that I am, it was the most annoying part to me, ha! =)


I made this on Saturday, and after a night in the fridge, I can tell you from experience: the ganache peeled off JUST like the real Hostess Cupcake frosting – WIN!

I’m not going to lie, this cake is A LOT of work.  Let’s just say a certain brother will NOT be getting the cake he requests next year.  I’m thinking maybe a Ding-Dong.


You know, a round sheet cake, a little filling, ganache coating, and be done with it?  To make it even cuter, I’d maybe even consider wrapping it in a giant piece of foil, but that’s only if I’m feeling any ounce of ambition left after this year’s Hostess Cupcake Cake fiasco!


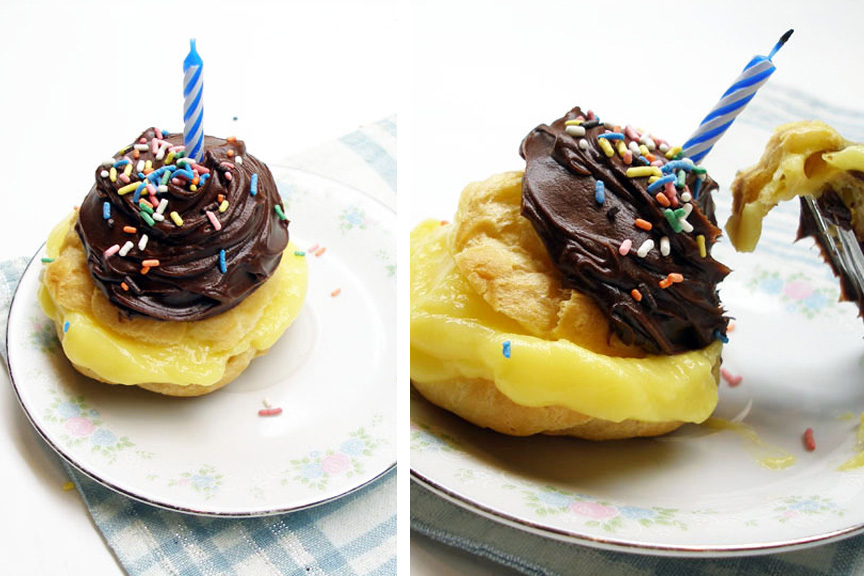
So, if you’re feeling a little more like going in a different direction, I would highly recommend Birthday Cream Puffs like I made for my brother’s birthday last March…

Or perhaps Birthday Cake batter Biscotti, like I made for my momma’s birthday last July…?!  Both Birthday Wins!

Happy {Belated} Birthday, Big Brother!

(When you end up feeling like, .2 years younger because of me and this cake, you owe me. BIG time)